design

Wednesday, 28 March 2012

Damask Ribbon Rose

Some time ago I posted the instructions for making a ribbon rose. The ribbon that I used at the time was a fairly wide 23mm ribbon. I've made this rose as I wanted to show everyone that it is possible to make a rose from thin ribbon. I used this beautiful thin wine damasks ribbon to show you what you can do.

The instructions for making this rose can be found here. The principles are the same just the size of the ribbon has changed.

Saturday, 17 March 2012

How to Decorate a Fabric Bag

Don't you just love it when something turns out right? Well, I do at least, and this latest bag is a 'just right' for me.

The kit is available from Craft Fairy at an offer price until the 25th March.

Everything can be bought separately if you would prefer.

To be honest this bag is simplicity itself to make.

Attached the green ribbon to the bag with Bondaweb. Occasionally put in a loop to look like leaves.

Attach the pink flower ribbon over the bottom of the flower stalks with Bondaweb.

Sew the buttons in place and the bag is done. How easy is that?

OK .... alert:

You can use double sided tape too.


Sunday, 11 March 2012

Cupcake Hair Bows

In my last blog entry, I showed you the new cupcake ribbons that have just arrived here with us at Craft Fairy. This time I am going to be far more proactive (don't you just love that word) and show you a simple bow project.

I've put in a picture right away as I always find it annoying if you have to wait until the very end until you find out what it is. 

So, to make this bow you will need:
Strong thread
a needle
Double sided tape.

C
Cut two 24cm pieces of 16mm brown ribbon 
Cut two 24cm pieces of 16mm pink ribbon 

Put a piece of double sided tape in the centre of each of the 4 pieces of ribbon. Make sure to put it on the wrong side of the cupcake ribbon.
When you've done this, remove the covering from the double sided ribbon and fold the outer edges to the centres that they touch and are held in place by the tape. 


Sick all 4 pieces as shown in the picture above. 
Cross the two pieces of brown grosgrain as shown and sew the two pieces together with a running stitch. 


Pull the thread tight and loop it around the ribbons so that they bunch up in the centre. Repeat this stage with the cupcake ribbon.   

Now, sew the cupcake ribbon onto the brown ribbon and finish with a button in the centre. You can add a pin or a barrette to the back if you like.

Thursday, 8 March 2012

Cupcake Crazy

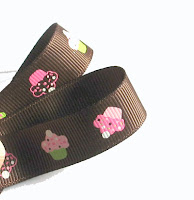
Everyone seems to be going cupcake crazy these days and not just for eating either. We have had a delivery of fabulous cupcake ribbon and I couldn't wait to get it on the web site for all to see. i thought that I'd give everyone on the blog a quick peek at the fabulous, and oh so hot ribbon.

 The first one is a 9mm grosgrain cupcake ribbon with really cute tickled pink cupcakes that seem to just dance across the ribbon.
 The second is every little girl's dream ribbon. Pink and cakes, what more could you ask for. Yumm!
For the last one, we couldn't leave the chocolate aside and so here it is in the fantastic 16mm chocolate brown grosgrain ribbon. Even more yumm!

Sunday, 4 March 2012

Newsletter question

I sent the newsletter out this afternoon and strangely enough, even though I am on the mailing list, I didn't get mine. So can you see if your has turned up? Please leave a comment to tell me one way or the other. It costs a lot to send the mail out so I want to know that it's working.

Vintage Colours for This Weeks Special Craft Fairy Offer

I know that all of you fellow crafters will be well into your vintage cards so that's why this weeks offer on the Craft Fairy site is one that has lovely soft vintage colours. I also think that varying the tones creates a luxury look and so that is what I have put together. The feathers are there because that are beautiful and because I love them.


So I used some of the elements in the offer pack to make a card for you as inspiration. Here it is:


I thought that I would vary the card a bit by using a ribbon flower to add a different finish. So here is an alternative for you:


The flower is a sneak peek of the latest ribbon flower invention that I have come up with. I really, really hope that you like it.

Sunday, 22 January 2012

Pull Treat for a Small Flattish Gift

Valentine's Day is just around the corner and, while we want that special gift from the one that we love, we also want it to be beautifully packaged. So here is an idea for making the packaging look superb and the treat inside it will seem so much better too!


This pretty pink package is made with:

a heart die cut

pink calligraphy pens

9mm pink saddle stitch ribbon

3mm saddle stitch ribbon

a sheet of heavy paper

1 sheet of medium weight card

1 flat gift a bar of chocolate is perfect.

The tutorial for making this gift wrap is to be found on splitcoast stampers resource page.

The flower making and pen blending technique can be seen here.

Once you have mastered the technique you can make the package bigger or smaller to suit the gift.


I would love to receive this. Now, how can I persuade my husband to make it? I'll let you know if I am successful

Monday, 16 January 2012

Craft Fairy Newsletter

Have you signed up for the newsletter? It is sent out weekly (or as often as I can remember) and includes discounts and projects. Just go to www.craftfairy.co.uk to sign up for the newsletter.

Sunday, 15 January 2012

Stained Glass Stamp for a Winter Card

I've had this stamp for quite a while now and it is a truly lovely stamp.

It is the Stained glass Stamp from the 'I Brake for Stamps' clollection on Craft Fairy and a must have for all stampers. I've chosen it for the weekly special offer and along with the pens used for making it.

The special offer includes a 20% discount. It really is too good to miss.
So, you will need:
Stained glass rubber stamp
Stazon, I used Stone Grey
Card
buttons
Foam pads
Art graphic pens in colours: 56, 2, 38
Offer available here

Stamp the image with stazon and using the blue pen and water colour in the glass pieces of the image. Leave to dry.
Now use the olive green and colour with a light touch the petals. For the stems use a more concentrated colour.
Colour the centres of the flowers in yellow.
Layer up the card with paper and buttones for a beautiful finish.


Friday, 13 January 2012

The winner is....

The winner is....

I am pleased to announce that ther winner of the blog candy give away is 

Jennie, The Crafty Wife.

If Jennie can get in touch I will post her goodies out to her.

Thank you to all those who took part and please come back soon as there will be regular give aways on this blog for the Next Year.