design

Wednesday, 3 October 2012

For my Demo at Dandie Crafts

On the 13th October, I will be demoing at Dandie Crafts on the Treforest Trading Estate.


So I am busily making cards to demo on the day. This is the first one that I came up with as I was specifically asked to demo ribbon weaving. I hope that you like it and will come along to look, learn and chat.
I will post the other things that I will demo as I make them so keep on checking back with me.

Thursday, 28 June 2012

My new DVD

How to draw flowers with calligraphy pens -- the movie

Well perhaps it's not that great but the DVD of How to draw Flowers with Calligraphy pens has arrived on my doorstep and I am well and truly excited.


This is my first ever DVD and it has been filmed to compliment the booklet that many of you have already bought.


This DVD is a step-by-step guide to drawing flowers and gives you lots of ideas for making cards and bags with your drawings. 

My watercolours

Some time ago I went on a watercolour course and we had some free inspiration time, so this is what I came up with. It's a rose hip in an autumn hedge much of which was created by the negative painting technique.
I rather like the effect as, even if I say so myself, I think that it glows.

Thursday, 21 June 2012

Bags of Fun

I've decided to go back to my recent obsession of sewing and I've decorated another bag. I wanted something quick and simple that would also be effective and have everyone asking. 'Where did you buy that bag?'
I hope that this fits the bill on all counts.
To make the bag, get the Summer bag kit from Craft Fairy.

Simply take:
1 jute bag, this one measures   Jute bag size 250x100x280mm
I piece of 6mm apple green ribbon
1 piece of flower ribbon 23mm wide
Some buttons from the summer flower pack
needle and green thread.

First make your flowers
Cut three lengths of ribbon in varying lengths and sew to front of bag. I used a couching stitch
Sew your ribbon flowers to the top of each length of ribbon.
Sew a button to the center of each ribbon flower and swing your bag. as it is now ready to use.

Friday, 15 June 2012

Rose Hairband for a Summer Wedding

Flower hairbands seem to be making a complete comeback recently. They remind me of my flower power days in the late 60's. I wish. I was too young for that, but I really did think that it was just so romantic to wander round with flowers in your hair. I loved them so much though that I decided to use these roses in stock for a while as they are a beautiful flower. They are quite large at 45mm per flower, but they are so right for this hairband where the small roses will just get lost.

This is simplicity itself to make.

Products used:

Really large paper roses
Barrel roses
Celadon ribbon
6mm red spotty ribbon

Measure the head of the child that is to wear the hairband. Use three or four pieces of florist wire twisted together to make a wire circle to go around the head.

Space the roses equally around the wire and twist into place. Interspace with the cream barrel roses.

Use some 6mm ribbon to twist around the florist wire. This will cove the wire and the stems from the paper roses. Glue in place as you go along.

Take a length of 16mm celadon ribbon and tie in a bow at the back of the headdress and you have finished.

Sunday, 3 June 2012

Lilacs have it

I'm sure that many of you that follow this blog will have noticed that I've not posted for a while. This has not been out of choice. I have been having internet and computer problems. Most of them caused by not reading the instructions. I know we all do it, but it took me so long to work out what the problem was that I sort of got myself out of the loop of blogging.

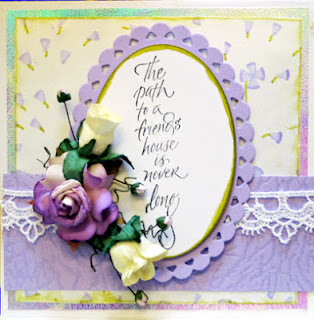
To celebrate my return (no groaning, please) I thought that I would start with a card. I haven't made a card in a while either but we have just had a huge delivery of paper roses and lace so I chose them both to inspire me today.
This card uses a selection of flowers and lace that you can get from my lovely web site, Craft Fairy.

Do let me know what you think as I don't seem to have had a comment in a very long time. Makes you think that no one cares! Or perhaps they think that the things that I do are so bad that they'd rather not say anything.

Thursday, 24 May 2012

Craft Show at Cardiff City football ground

Whoops, I forgot to let everyone know that Craft Fairy will be exhibiting at the brand new Craft Show at the City grounds in Cardiff. Please come along and say hello.

Sunday, 1 April 2012

Simple Little Daisy Card

One of the things that customers always say to me at the shows is that my cards are clean. I rather like that as, while I can do fussy, the things that really attract me are the simple cards that have a big impact. I think that I've achieved this here. What do you think?

To Make this card all you need to do is stick a piece of the new funky flower ribbon to the centre of the card with double sided tape.

Stamp the sunshine sentiment and mount on to pink card.

Colour up and stamp the Leaning Daisy image, cut out and stick to the card with foam page.

Stick on  a few buttons and your card is finished.

How simple was that!

Wednesday, 28 March 2012

Damask Ribbon Rose

Some time ago I posted the instructions for making a ribbon rose. The ribbon that I used at the time was a fairly wide 23mm ribbon. I've made this rose as I wanted to show everyone that it is possible to make a rose from thin ribbon. I used this beautiful thin wine damasks ribbon to show you what you can do.

The instructions for making this rose can be found here. The principles are the same just the size of the ribbon has changed.

Saturday, 17 March 2012

How to Decorate a Fabric Bag

Don't you just love it when something turns out right? Well, I do at least, and this latest bag is a 'just right' for me.

The kit is available from Craft Fairy at an offer price until the 25th March.

Everything can be bought separately if you would prefer.

To be honest this bag is simplicity itself to make.

Attached the green ribbon to the bag with Bondaweb. Occasionally put in a loop to look like leaves.

Attach the pink flower ribbon over the bottom of the flower stalks with Bondaweb.

Sew the buttons in place and the bag is done. How easy is that?

OK .... alert:

You can use double sided tape too.